Tuesday, November 25, 2014

Printing with Supports

Long bridge will likely need support

Summary: Print support structures for clean bridges.


Yesterday I printed out a very large part that took 19 hours to complete. The part has a long bridge that probably would not have printed well without a support structure. I was not going to risk a print this large so I selected the "print support structure" option in Cura.

waffle pattern of the support structure

The support structure is designed to print just enough surface to support the layer above. It is also designed so that it will separate easily from the rest of the print.

finished print with support
close up of support

The support did a great job of keeping the layers above nice and flat. I tried to peel the support off by hand but I couldn't. So I started by carefully pushing a razor blade in along the edge of the support line. Then I tried to remove the layer by hand again. Not quite. Finally I used a chisel blade on my x-acto knife and slipped it in between the support and print along both sides. That popped the support off.


The bottom surface is a little hairy looking where the support was but that's ok as it is the bottom of the piece. I used a file to knock down some of the high spots. More importantly, the sides of the piece are nice and clean.

support removed
nice clean bridge

Saturday, November 22, 2014

Raven Skull


Summary: 3D Kitbash models are amazing!  UM2 print quality is unbelievable on the high quality defaults.

While browsing Thingiverse one day I came across this amazing raven skull model. It is from the Boneheads collection by 3D Kitbash. The Kitbash models are really well designed. First, the surface detail in the model is impressive. Where most models have smooth surfaces, the Boneheads seem to have a subtle surface texture in the model which breaks up the print lines and makes the final print look like bone and not plastic. Also, the models are designed in multiple parts to avoid bad overhangs, odd flat spots from the print bed, or the need for supports. The parts assemble with pins that are printed from a separate file, no glue is needed.

2 part model

I have wanted to print this model ever since I got the UM2 set up. But I wanted to wait until I was sure the machine was up to the task. My prints have been turning out really nice so I decided to give it a try. I was pretty sure it would print fine, I just didn't know how good the print quality would be. I loaded up the model in Cura and selected the high quality print setting at 215°C. A little over 6 hours later, the print was done. I realized after the fact I probably could have gotten away with a lower infill and saved some time.

hot off the printer

The print was nearly flawless. I never expected the UM2 to print this well; the layers are almost invisible. The tip of the beak was a little melted and there were a few blobs on some of the worst overhangs. But everything else was perfect. Both issues were easily fixed with an x-acto knife and a small file.

slight melting at beak tip

small blobs on the overhangs

Next I printed the pins and assembled the skull. The pins held the skull together tight, but there was a little play in the parts and the joint was too visible for my liking. So I added some cyanoacrylate glue and held the parts together to close the gap. My printer leaves about a 0.5 mm lip around the base of any prints. I needed to remove the lip around the seam of the skull. I used a new blade on my x-acto knife and carefully cut away the bulk of the lip. Then using the edge of the blade, I scraped the remaining seam down to the surface of the skull. By following the grain of the layers, the scraped area blended nicely with the rest of the print. It is more obvious in the pictures; in person it is hardly noticeable.

top seam

right seam

left seam

The raven skull is one of the few free models from 3D Kitbash. There are several other equally awesome models available for sale on their website. With all of the free 3D models available I never thought I would pay for a model. But I am so happy with this one, I just may have to drop a few bucks for some of the other models. This print will likely be the flagship of my collection. But first, you just know I am going to print the wall mount.


Thursday, November 20, 2014

Replacement Nuts

cracked nut

Summary: Using 3D printing to fix things around the house.

Today I noticed one of the nuts was missing from our floor mop. Upon closer inspection it became apparent that the other nut was broken. I could easily have grabbed a pair nuts from my shop and used those as replacements, but where's the fun in that?


I quickly designed a replacement in 123D Design. I changed a few measurements to try and make the new nuts stronger. Then I printed out a pair on the UM2 at normal quality.


What do you know, they fit! There were a few design challenges. I tried to size the hole so the screws would cut threads into the nuts. The size of the screw hole was critical. Too small and the nut would crack. Too large and the threads wouldn't catch. I also added a chamfer at the bottom of the hole to make it easy to start. I guess I got it right because the screw is on nice and tight without cracking. I needed pliers to screw it on the first time, but after that I could do it by hand. I also needed to make the nut strong. I meant to print it solid but I forgot. But luckily it looks like the 20% infill was sufficient.

problem solved

The new nuts work perfectly. And as a bonus, the print lines give the nuts a no-slip texture! Maybe this wasn't the most practical solution but the blue plastic knobs look much nicer than a pair of steel hex nuts. And who wants to use a wrench on their mop anyway? I wonder what else needs fixing around the house?...

The files are available on YouMagine and Thingiverse.

Printing Multiple Files at Once

5 files printed at same time

Summary: Print multiple files at once for ease and better quality.

I have always wanted to get an old Spirograph set for my kids. But then I discovered this 41 piece Spirograph set on Thingiverse. Why buy when you can print? Looks like a nice Christmas present I can make for the kids. There are a lot of parts to this set, so I decided to print several gears at once. Printing multiple parts at once is not only easier, it can also result in nicer prints because each layer has plenty of time to cool before the next layer is printed.


To print multiple parts you just keep loading model files. Cura will automatically space the parts out for you. Select the "print all at once" option under the tools tab to for better print quality. Otherwise you will just be printing one model at a time and you won't get the benefit of letting each layer cool. Then just save the file to the SD card and print as you normally would.


I printed these at 220°C with the normal quality defaults and they came out great. The teeth mesh perfectly. The one downside to printing multiple parts is you can get stringing between the parts. There was no stringing on this print. I'm going to wait until I have some more colors of PLA before I finish the set to make it a little more colorful. Six parts of the Spirograph done, 35 more to go!

Wednesday, November 19, 2014

Steam Train Whistle


Summary: My first print with custom settings. Use the pause function to correct minor errors during a print.


Since before I got my 3D printer, I have wanted to print this steam train whistle from Thingiverse. I thought it would be cool to print something functional, even if its only function is making noise!

first try

My first attempt didn't turn out so well because the filament feeder was skipping.

second try

I tried again after "fixing" the problem only to have the feeder start skipping again and ruin another print. I was feeling cocky after a successful print so I had upped the printer speed to 80 mm/s. That's still a conservative speed for the UM2 but maybe that was the reason for the skipping?  Rather than repeat the print at 50 mm/s, I ended up disassembling the filament feeder and performing an Atomic Clean on the print head. While feeding the filament back into the bowden tube I noticed that unless the curve of the filament matched the curve of the tube, the filament would bind firmly in the tube. The deep pits in the filament from the feeder probably didn't help either. So I cut off any filament that had been through the feeder already, made sure the filament was uncoiling cleanly and following the curve of the bowden tube, and fed it back into the filament feeder.

stray filament

Bingo, that did the trick. The PLA seemed to be flowing smoothly so I set up the whistle print again, this time at 50 mm/s. About a third of the way through the print I noticed a piece of PLA had been pulled out of place and was sticking up in the middle of the whistle chamber. I was worried that this might affect the sound of the whistle so I paused the print. To pause a print, just go to tune < pause printing with the navigation button on the printer. A pause also moves the print head out of the way. With the print paused I was able to cut off the piece of stray filament. Hit "unpause" and the print picks up where it left off with no visible sign of the interruption.

third time's a charm

About an hour later the print finished. I didn't hear or see the feeder skip once during the entire print. The whistle looks great and sounds just as good. And it is loud. The kids should love it...my wife will hate it.

I used the full settings and made some adjustments as recommended by the whistle designer. The final print settings were as follows.

220°C
0.25 mm layer height
0.75 mm bottom/top layer
25% infill
0.8 shell
0.3 mm initial layer
50 mm/s print speed
all other settings were default

Don't Over-tighten the Material Feeder!!!

this is what happens when feeder tension is too high

Summary: Over-tightening the material feeder will cause the filament to slip and will lead to under extrusion.


Yesterday morning I made the nice print pictured above with the normal quality settings. That evening I tried to make some more prints. They did not look good.

Multirotor helicopter foot.  WTF!

The picture above was the result of a normal quality print. Looks like under extrusion again. I was already printing at 220°C so I didn't think temperature was the issue. It was a model that I designed from scratch so I thought maybe the problem was with my model. I downloaded a popular whistle model from Thingiverse and tried again. This time I used the full settings so I could change the layer height, number of layers, and infill as directed.

not even close

As it was printing I could hear some clicking coming from the material feeder as the knurled wheel slipped on the filament. I thought the tension on the material feeder might not be high enough so I tightened it until the indicator was on the center line. No improvement. I canceled the print after about 30 minutes; the layers were a mess.

reducing resistance on spool

I thought the nozzle might be clogged but before I tore it down I decided to check the UM forum again and search the under extrusion posts. I noticed that under extrusion can occur when the coils on the filament spool have trouble unwinding. This seemed particularly common with Ultimate-Blue PLA as it seems stiffer than some other brands. So I removed the spool, unwound a bunch of coils, and tried to straighten the filament as best I could. Then I tried printing the multirotor foot again.

proper tension setting on the feeder

With the machine back facing me, I noticed the material feeder slipping about every 5 seconds. With the better view I could see how too much tension (rather than not enough) could lead to the slipping I was seeing. So I backed off the tension until the slipping stopped. The material started feeding just fine, no more slipping.

that's better

The foot printed perfectly. Thinking back, I believe the first thing I did to combat under extrusion was increase the tension on the material feeder when I should have been increasing the temperature. Keep in mind there are two different versions of the material feeder for the UM2. There is an older version which apparently had some problems and needs to be adjusted to about the middle setting. And there is the new version which I have which likes to be set towards the top. This setting is much more critical than I expected and I wonder how many under extrusion problems are a result of improper tension on the material feeder. Check this first as it can save you the trouble of cleaning your print head!

Tuesday, November 18, 2014

Printing from 2D Images

test image

Summary: Super easy way to make 3D prints from 2D images.


I went back and re-read the Cura manual last night and I was surprised to learn that you can easily make 3D prints from 2D images! Just select the image to print, tell Cura how thick and how large to make the print, and go.

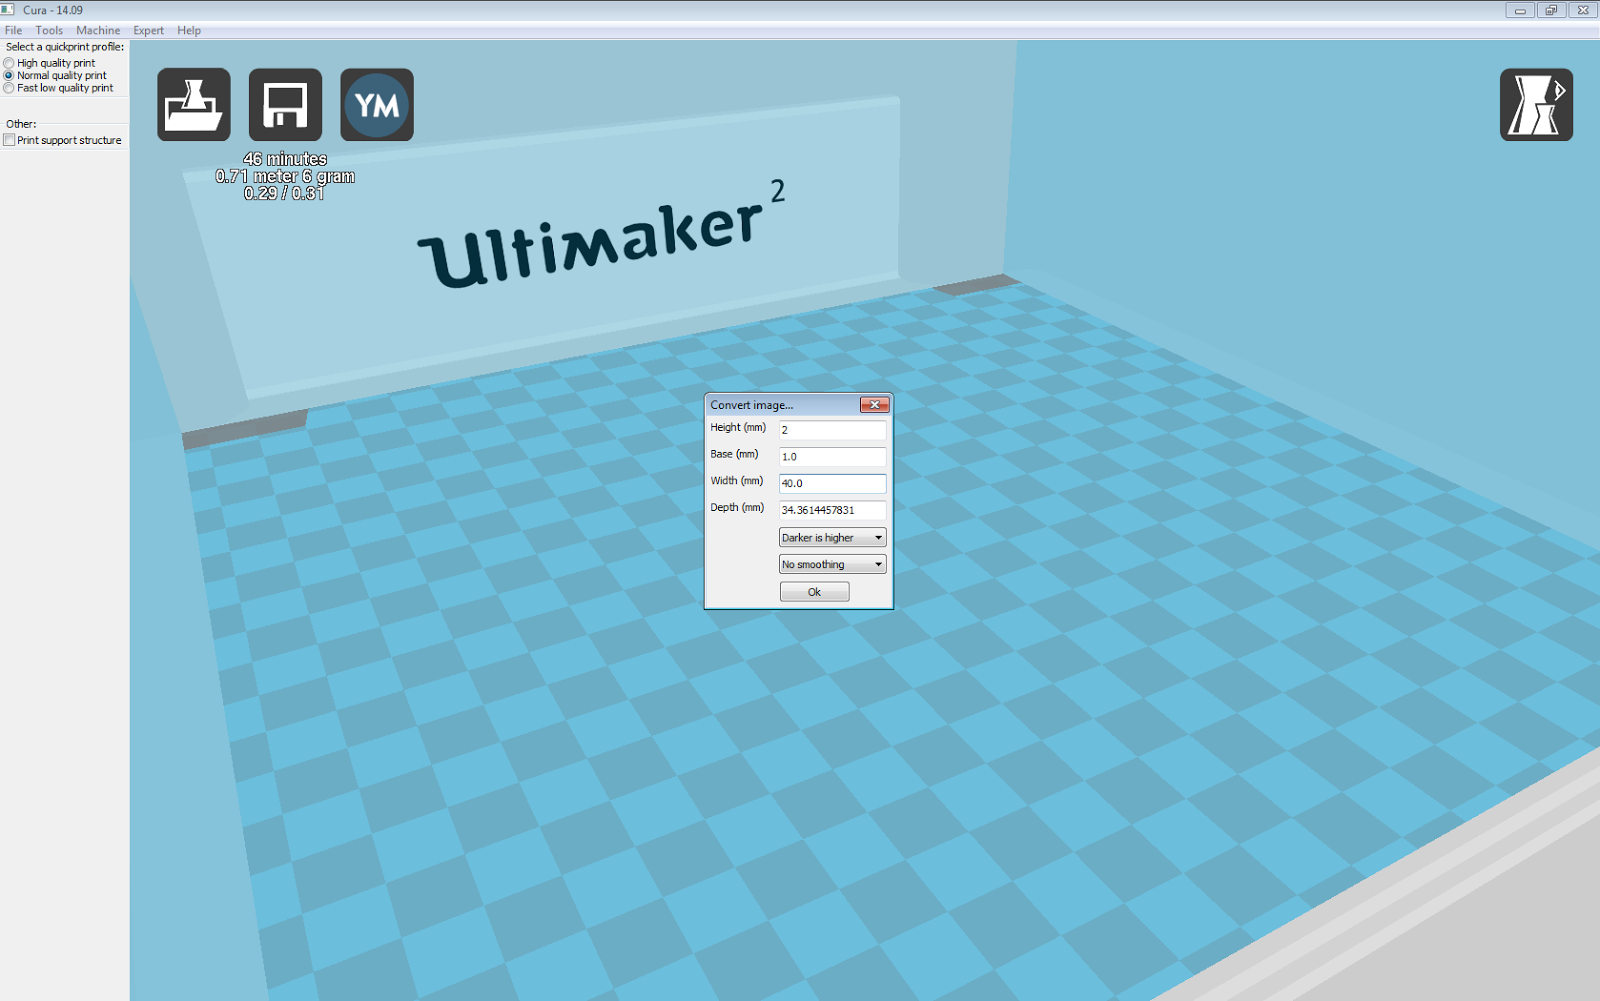
setting print dimensions

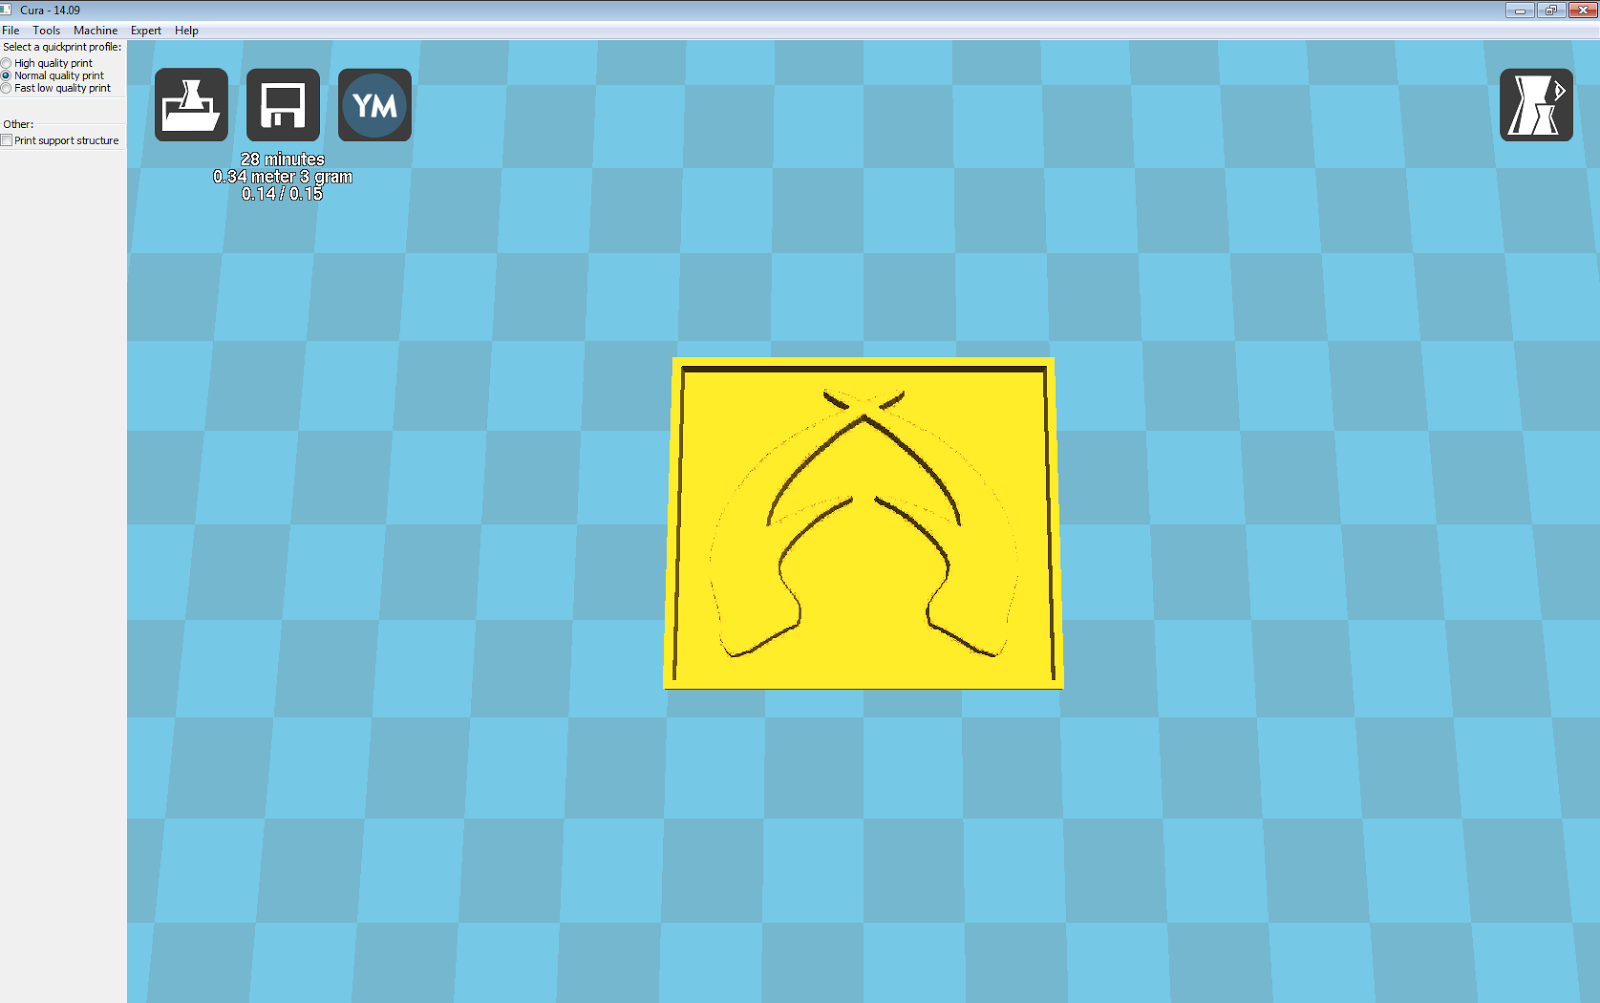
I went to File < Load model file... and selected a .png image of my company logo (same exact file as above). That opens a dialog box where you set the print dimensions. I selected a 1 mm base layer, 2 mm extrusions for the image (height), and a 40 mm width. The depth will automatically scale with the width setting, and vice versa. Once you click OK, Cura converts the image to a .stl file. I chose the normal quality print setting and saved the gcode to the SD card.

converted image

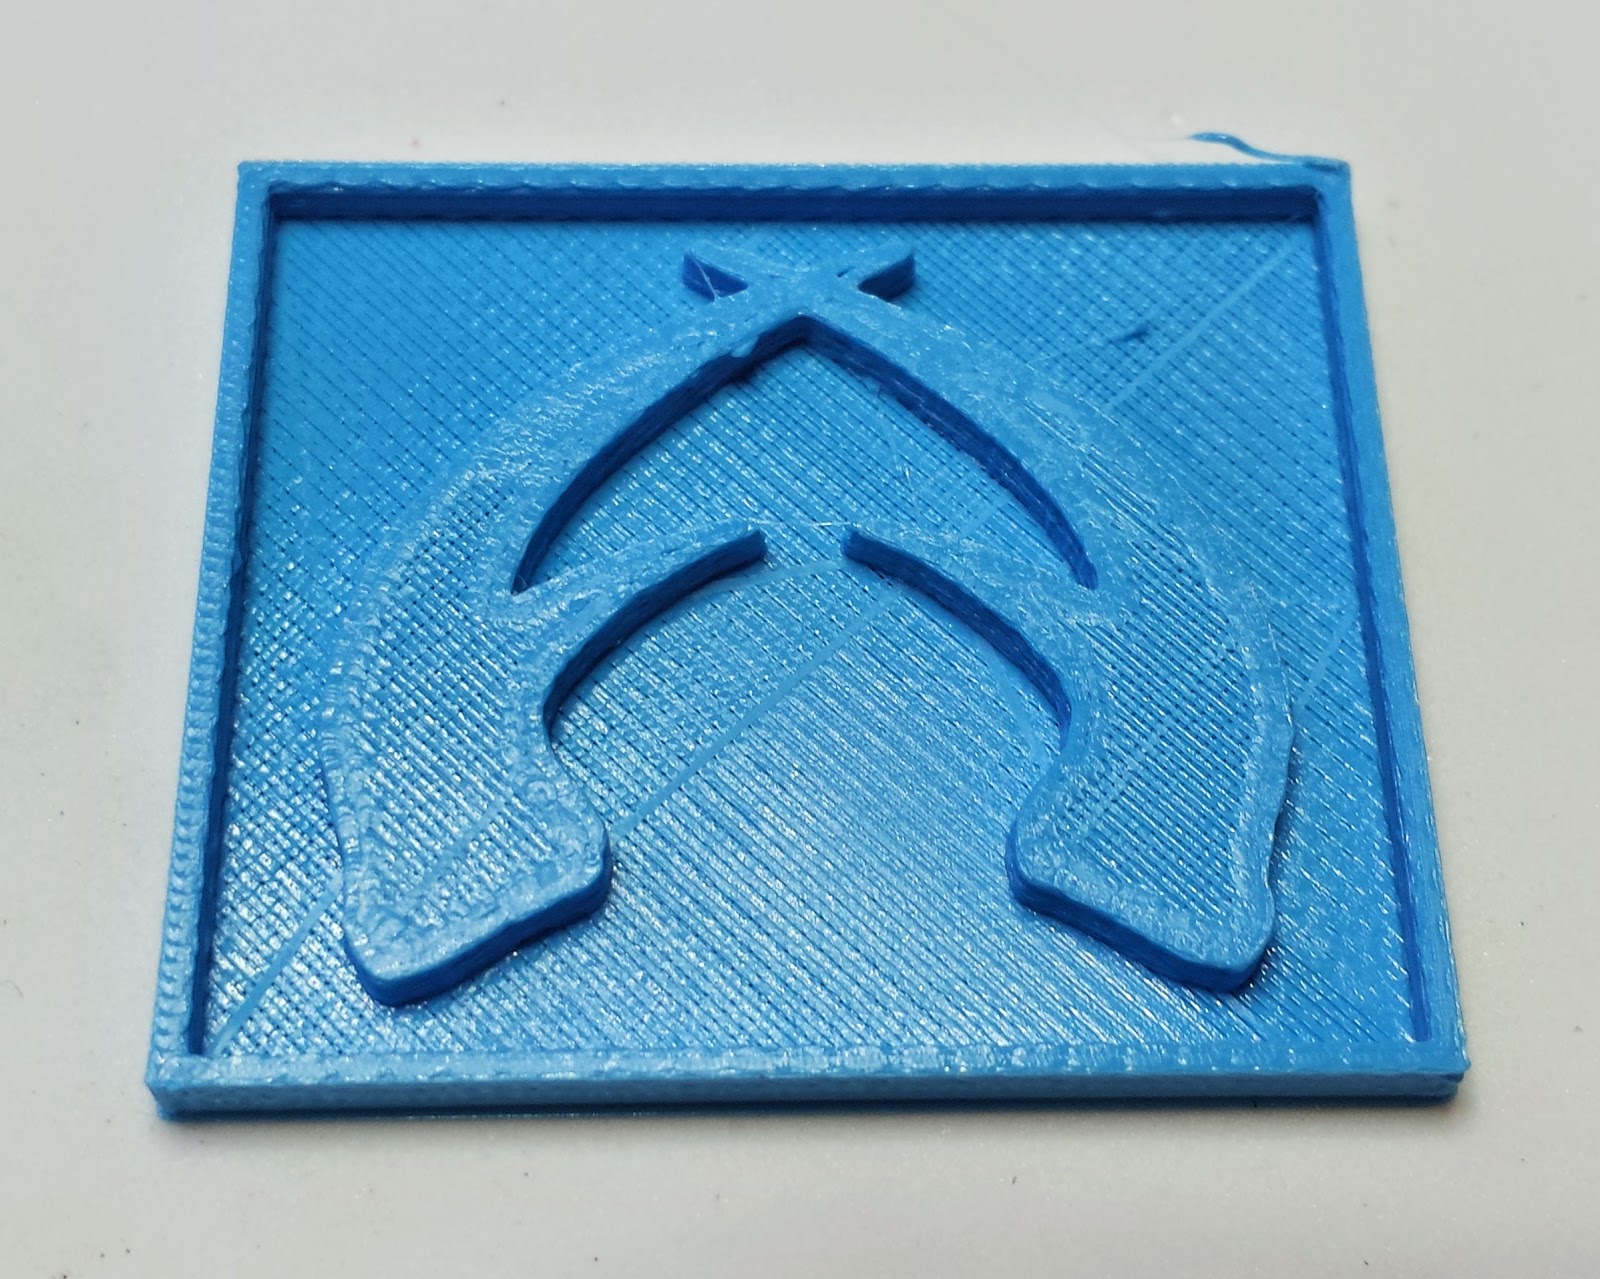
I printed this without glue and I had no problem with adhesion. The file took 28 minutes to print and came out great. This was too easy. I have a feeling I am going to be melting a lot of plastic printing all sorts of 2D images.

finished print